The X1 SDR shortwave receiver is sold as a main unit, so planning the listening setup matters before it arrives. A suitable external antenna and a correctly specified power supply are both needed separately. This checklist helps you prepare the desk and approach your first reception test in a clear order.
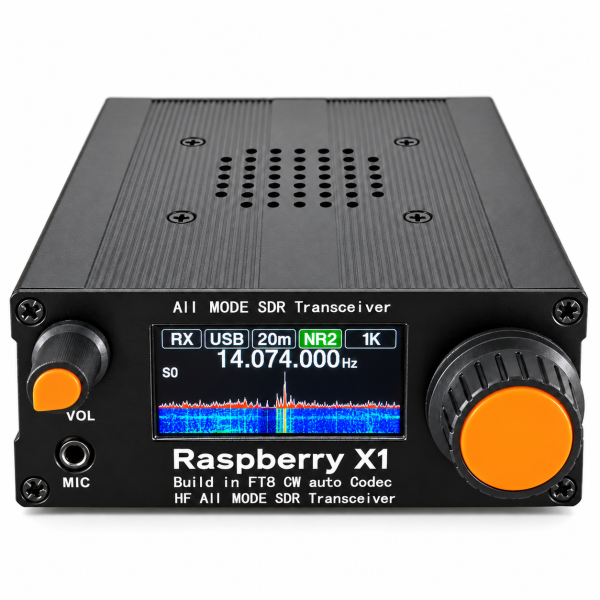
1. Confirm the supplied receiver configuration
The current store listing describes a desktop receiver with a supplier-listed reception range of 3.5–30 MHz. Its modes are LSB, USB, CW-L, CW-U, AM and FM. The FM mode applies within the supported range; reception of the 88–108 MHz FM broadcast band is not specified.
Although the enclosure has “Transceiver” wording, the supplied configuration is a receiver. Ready-to-use transmission is not included. Build your initial setup around listening rather than assuming a microphone or transmit function comes with the unit.
2. Plan for an external antenna
The X1 has a BNC antenna connector. Select an antenna suitable for your intended shortwave listening and confirm that its connector or adapter matches. An antenna is not included in the package.
Antenna choice and placement affect reception, alongside local interference and signal conditions. Before settling on a desk position, consider where you can place the antenna and route its cable. Do not assume the connector type alone determines how well an antenna will receive your intended signals.
3. Verify the power requirements before connecting
The listed DC connector size is 5.5 × 2.1 mm. That measurement identifies the connector, not the required electrical supply. Confirm the voltage, current requirement and polarity for your exact unit before plugging in a power adapter.
The current listing does not provide those electrical values and does not include a power supply. Contact support for confirmation rather than choosing an adapter simply because its plug fits. Keep the confirmed specification with your setup notes for future replacement purchases.
4. Begin with one reception goal
For the first session, choose a known signal within the listed range and select its appropriate reception mode. Set a comfortable volume and use the main tuning dial to adjust the receiver. Begin with ordinary reception before attempting several advanced functions at once.
Record the frequency, mode, time and antenna arrangement for a useful comparison later. If you hear little activity, revisit those factors and local conditions before concluding that the receiver is faulty.
5. Use the display as a tuning aid
The X1 combines a spectrum trace with a waterfall display. The listing specifies a 30 kHz spectrum view, showing a portion of the band around the selected frequency. Use it to observe nearby activity and changes over time as you tune.
The display supports exploration, but a visible signal does not guarantee intelligible audio in every mode or successful decoding. Keep the mode and tuning appropriate to the signal you are trying to receive.
6. Add noise controls and decoding gradually
Noise reduction, a noise blanker and a notch filter are listed. Change one control at a time and compare the result with your previous settings. Their usefulness depends on the interference and reception conditions.
Built-in CW and standalone FT8 decoding offer further ways to explore supported signals. Decoding depends on signal strength, interference, tuning and configuration; FT8 also requires accurate time synchronization. Establish a working reception setup before judging decoding performance.
Check the package and ask the right questions
The confirmed package is one X1 main unit, without an antenna, power supply or microphone. Review the X1 product page before ordering and send any accessory or power questions to dxu76256@gmail.com.
Our Downloads page provides available support resources. If an exact X1 resource is not listed, ask support before using files intended for another device. Include your unit version and a clear description of what you want to receive.
Based on the current SHJ Communications listing. Specifications and available resources depend on the supplied version.